
Drew’s Art Box is an art lesson in a box! Each box contains 4 lessons featuring a different art technique in each one. This box is ideal for ages 9-13 so we’ll be completing our activities with Penelope. Along with all the tools you’ll need to complete your project you’ll also receive detailed instructions and links to instructional videos. Boxes are $35 each
*product was received free for review
Check out the unboxy box video
Here’s the Box Breakdown

Our first glimpse inside Drew’s Art Box – this box is super cute

Everything that we received in our “Polymer Clay” edition from Drew’s Art Box. We even have some tools of our own from back in our sculpey phase
So what is all this stuff?

Our box insert offers detailed instructions.
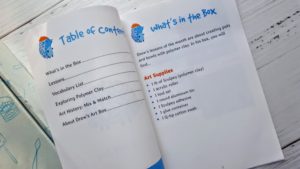

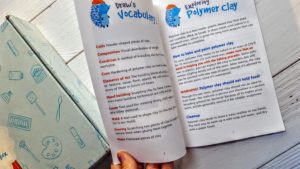
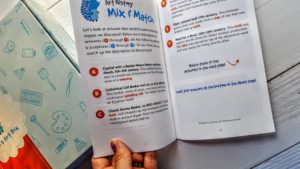
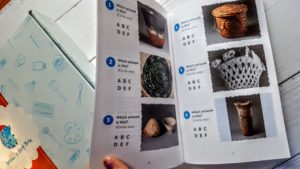
This is a full workbook of lessons and information. Perfect for homeschooling families or educators. There is a quiz and vocabulary in addition to the links to the lessons which is really cool.
Tin Pan
This will be used to help shape our sculptures
Acrylic Roller
This roller is actually really neat. We thought it was a hollow dowel until we looked at all the items included in the workbook
Tool Set
This set includes 5 plastic tools (which are great for kids) to work with to manipulate your clay.
Cupcake Liner
We are guessing these were included to hold our glue
Q-Tip
Another useful tool when working with Polymer Clay Glue are q-tips. We received one in our Drew’s Art Box
Sculpey
We received 1 lb of Sculpey. This is the polymer clay that we’ll be working with in this box
Sculpey Adhesive
And as a companion product we also received this Sculpey Adhesive.

This adhesive is bakeable and works on most oven baked clays. We received a 2 ounce bottle.
Okay so show us what you made?
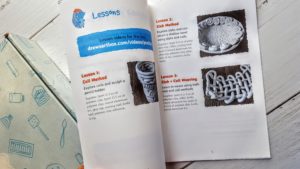
The box comes with a link that has clips for 6 videos. Each project has a practice prior to the actual project to help develop your technique

The first video familiarized us with Polymer Clay. We split our clay into thirds (each project uses about a third)

We then condition our clay… warming it up and making it more pliable

Next we roll it into quarter sized balls

We then roll those balls into “hot dogs”

And then we roll them out even further into foot long strips
We then practice making different kinds of coils


Here are our creations.
These coils are to prepare us for our pencil holder structure

We prepare by rolling out balls the size of quarters again

And again roll it out.

We then pour some glue out into the little holder

We create a round coil and then flatten out one side to be the base of our pencil holder

And then we score… these grooves help the pieces adhere better

Next we make a donut and score that as well to be the next step in our pencil holder

We put glue on both pieces and stick them together

Each step is the next set of coils – creating, scoring and gluing. The kids really liked this because they got to choose what type they wanted to add

We then pop this into the oven in our tin pan at 275 degrees for 15 minutes
The next lesson teaches us rolling “slabs”

So for this one we need our scoring tool, a third of our clay and our roller

We practice rolling out the clay and also how to find and rid the clay of air pockets

This all helps us to create our bowl

After we’ve rolled out our clay we then use the tin foil pan to carve out a circle

Once we have a circle, then we fix up the edges

We let the girls decide what sort of coil they wanted to add and they went with the “wave” pattern

We then apply our pattern to the edges to make sure it fits appropriately

After we have it how we want it we need to score and glue it. Then we design the inside… this was another one we let the girls decide. We have to say that we don’t envy art teachers.. our inner control freak and desire to create something “perfect” kept trying to rear it’s ugly head. But in the end they did what they wanted and were really happy with it.

The fifth video teaches the “loom” technique. This practice asked us to create a square and weave together the pieces. Penny had trouble doing this… so we didn’t bother with photos and really tried to just help her get the hang for the finished product.

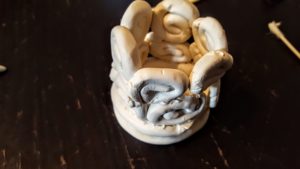
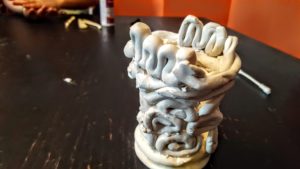
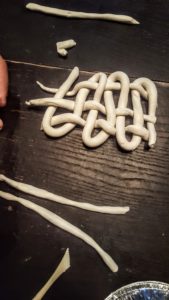
So for our final project we use our final third of clay and our knife tool

We split it in half and then roll one half out into a very long snake

We followed the instructions which had us lay it out like this

Then we take the other half of the clay and roll it out into four strips. We then cut those in half
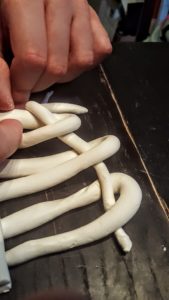

Then we drape those pieces over and weave them into the existing coil

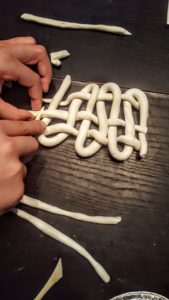
Now we trim our edges

And drape this over our tin pan – pop it in the oven to bake

Here are our three finished projects. The kids can’t wait to paint these… this was so much fun!
So in summary
We look for three things in a subscription box; quality, curation, and presentation. The Drew’s Art Box is a great way to develop artistic technique in children who are homeschooled or just a great way to spend time with your kids creating things with your hands! The presentation is awesome. The box is adorable and everything arrives perfectly. The quality is fantastic. All our tools are great for kids and we received brand name products like Sculpey. Curation is phenomenal though and what really makes this box stand out. The lessons are amazing… they’re short enough that they’ll hold children’s attention but really help them to understand the technique. Wonderful box! We are so happy with what we made!
Check Out Drew’s Art Box
The post Drew’s Art Box Subscription Review + Unboxing | May 2018 appeared first on Not a Tree Subscription Box Reviews.