


*post contains affiliate links which means NAT receives a small commission for each sale made

Little Workbox is a monthly STEM subscription box for children. Each themed package includes up to 4 projects specifically designed for the 8-15 age set. Boxes have a value of $30-50 for just $19.95 a month. This package ships worldwide from the US. NAT received this package at no cost in exchange for review.
Subscription Box Unboxing
Subscription Box Review

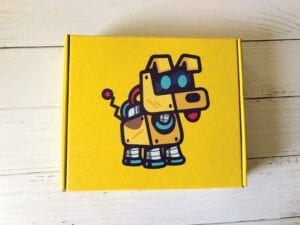
My first glimpse inside the Little Workbox for September.


Everything that came in our “Spinning Blades” themed box. There are a total of three projects included.
So what is all this stuff?

Our insert is an image of Cassiopeia.

Turns out it’s a postcard.


Also included (and used in all three of our projects) is a small screwdriver as well as wood glue.

Our first project is a vacuum cleaner. I really like how each project is individually packaged.

The instructions are pretty simple and they’re very detailed which is great. They also have Youtube videos to help complete your projects as well.

Included in this packet is a wood strip, large wood block, small wood block, fan, motor, motor holder, screw, rubber band, double sided tape, battery holder, red wire, black wire and a filter net.

The first step to completing this project is screwing the motor holder into both the wood blocks.

Then we’ll glue the long wood strip onto the wood

Now you’ll connect the wires to the motor from the battery holder. This part is important as you’ll have to be certain the wires are on the right side.

Now you’ll connect your fan to the motor shaft

Using the double sided tape you can attach the battery holder to the wood block and place the motor in the motor holder

Then you’ll attach the filter net onto the bottle (this is the only item you’ll need to included at all in this box).

Then you’ll fix it onto the wood.
Moment of truth!

The next project is the Propeller Plane.

Here are the instructions for this project.

Inside our packet for this project we have; long wood block, long wood strip, small wood block, motor, propeller, battery holder, wood strip, wheel, tire, long steel round rod, short steel round rod, wood round bar, shaft sleeve, double sided tape and a zip tie.

The first step in completing this project is attaching the two wood sticks with the round wooden pieces

Now you’ll glue the wood block onto the wood stick and then glue the wood strip to the top of those two items.

Now you’ll glue the small wooden blocks underneath being mindful of the hole placement

Next you’ll assemble the wheels.

Then using the steel rods you’ll fix the wheels to the body of the plane

Our next step is attaching the wires to the motor

Then attaching the battery holder to the top of the body and adding batteries. We’ll also use double sided tape to fix the motor onto the front and then secure it in place with a zip tie.

Second to last we’ll attach the wings to the top of the plane using wood glue! This thing is really coming together!

Finally we’ll attach the propeller to the front of the plane.

The final project in our box for the month is a solar powered fan

Here are the instructions for this project

Included we have a long wood stick, base platform, rectangle wood block, triangle wood block, trapezoid wood block, square wood block, motor holder, motor, solar panel, fan blade, screw, wire connector, and wire

This was the project that Penny was most excited to complete

We start by attaching the four small wood blocks to the platform, essentially creating feet

Now you’ll attach the wire connector to the wood strip using the screwdriver

After you’ve done that you’ll attach your two triangles and trapezoids to the strip with the wire connector like so.

It should look like this.

Then we use the double sided tape to attach the solar panels and motor holder to the platform. I think I may have missed pictures of inserting the motor in the motor holder as well as attaching the wood strip to the platform.

Next you’ll attach the wires to the wire connector being sure the colors are on the same sides. This worked I took a video but i exceeded the maximum upload size of my site! Penny thought this was awesome and I got lots of Mom points for this one!
So in summary
Presentation: Everything was packaged well and the instructions were very clear in my package from Little Workbox
Quality: I love the quality of each of these three projects. Penny kept all of them and has been telling all her friends about them.
Curation: I thought this Spinning Blades themed box was awesome and we had a lot fun completing each of the projects.
Subscribe to Little Workbox
The post Little Workbox Subscription Box Review + Unboxing | September 2020 appeared first on Not a Tree Subscription Box Reviews.
Powered by WPeMatico